Greetings, craft-a-holics! Jennifer, here, with a fun little touch for your organizers and notebooks.
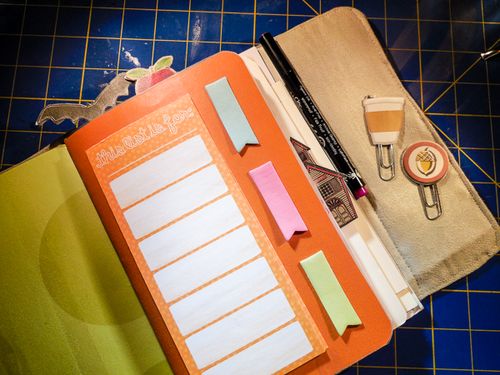
Today's project was inspired by the many amazing planner decorating videos on YouTube and all the fun accessories that are out there! Of course, I'm the type to make them myself rather than go out and buy them (I've even designed my own planner for the last several years), and I have a hunch plenty of our readers are, too.
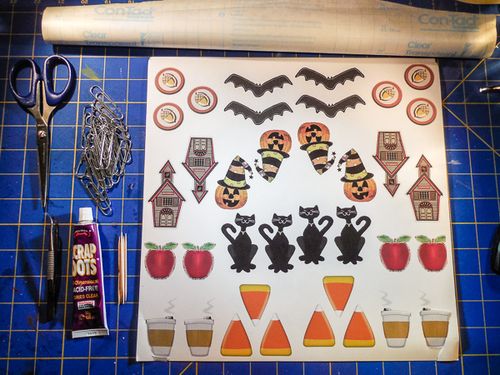
Making decorated paper clips is really simple and I like them for marking my current pages in the different parts of my planner. This is what you'll need to make your own set:
* Clip art or cut-outs
* Large paper clips
* Scissors
* Helmar Liquid Scrap Dots
* Toothpicks or skewers
* Tweezers (optional)
* Laminating film or clear shelf paper (optional)
I have lots of cute elements from years spent collecting digital scrapbook packs, but clip art or ready-made cardstock design elements will work perfectly well. I grabbed different designs and filled half of a 12×12 sheet with them, then mirrored them on the other side so all my clips will have matching fronts and backs. Then I just printed them on my home printer.
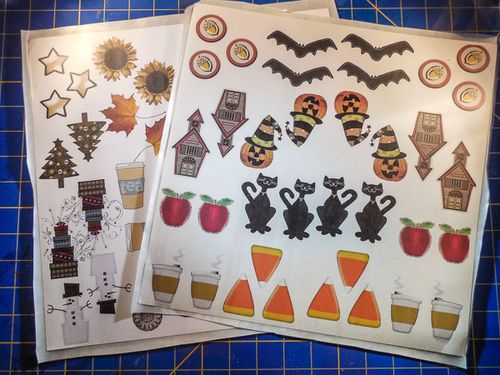
This step is optional, but if you want to reinforce your images, cover them in lamination film or clear shelf paper before you cut them out. I know my planner takes a bit of a beating, and this will help them stay pretty while they're in use.
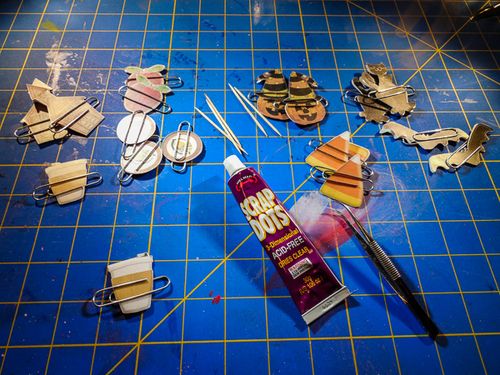
Cutting out the little designs is the most time consuming part of this project, so it's a good time to catch up on a couple episodes in your Netflix queue or what have you. I like to pair up my fronts and backs as I cut them out, just so I don't lose anything in the shuffle, and clip them together with their paper clip.
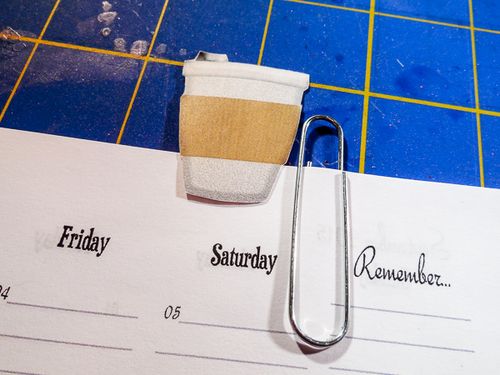
Once you have your designs ready to go, you want to figure out how much overlap they'll have on the page. I made my images between 1.5" and 3" each, and I don't want that all sticking up from the top of the planner. I take a spare sheet and figure out how much overlap I want and draw a little line on the back of one of my pair of shapes.
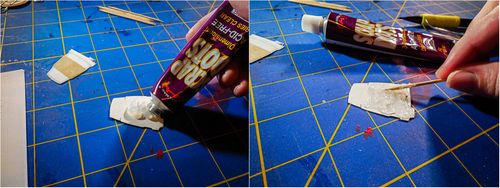
Then I squeeze a generous amount of Helmar Liquid Scrap Dots onto the back of one of the images, down to the line, and spread it around with a toothpick to get more or less even coverage. It's not necessary to push the adhesive all the way to the edges since the glue will spread a bit when we add the top layer.
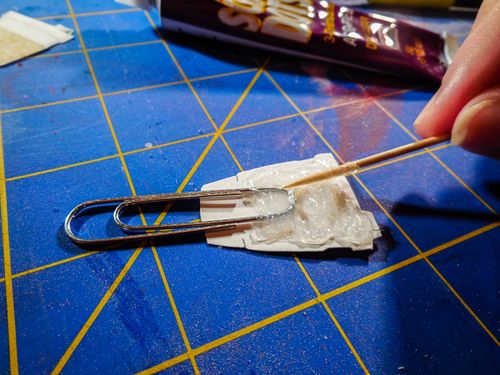
At the center of the adhesive's edge, position the single-loop end of the paper clip into the glue and then use the toothpick to "comb" some adhesive over the top of the clip. It's important to keep the ends of the paper clip clear of the glue and it helps to have the smaller loop extending from your shape–otherwise slipping the clips onto your pages could be a bit more difficult.
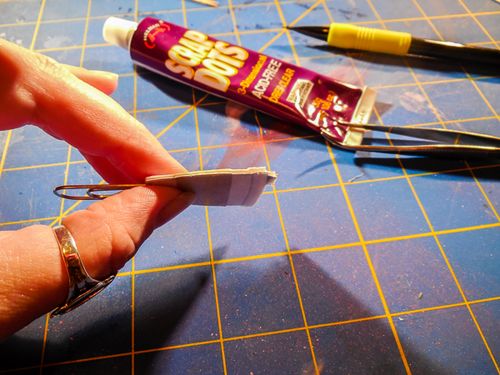
Then line up your matching image and gently press into place. The perfect amount of pressure will spread the glue to the edges of the shape, filling the gaps and providing a sturdy inner structure for the decorations. Then you want to leave them to dry for several hours or even overnight.
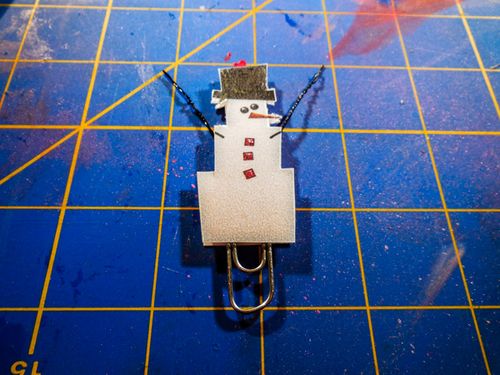
When you pick your clip art, it's best if they're pretty self-contained shapes. This snowman I picked out for my December pages had skinny little arms that would have torn off at first use, so I just cut out his body and left the arms on the cutting room floor. In their place, I twisted a doubled piece of black wire into a sturdy cord and placed it in the layer of Helmar Liquid Scrap Dots along with the paper clip. This way the the snowman gets to keep his arms for longer.
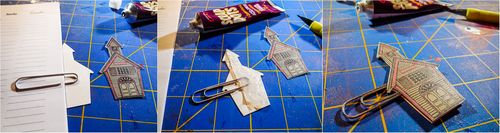
For some of my very tall images, like the schoolhouse and black cat, I opted to place the clip at an angle from the image, so these can be used on the sides of pages like more traditional tabs. I followed the same steps as above, just changed my orientation.
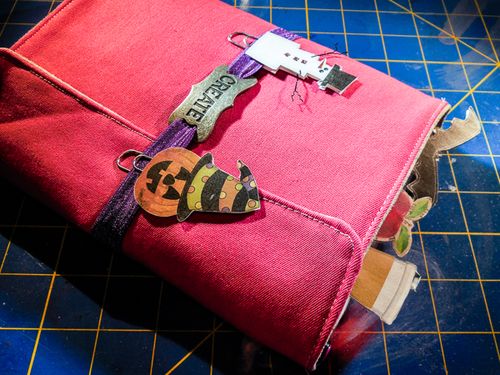
Aside from the fussy-cutting, this project is a simple and fun way to dress up planners, notebooks, and office supplies. I hope it inspires you to try it out and make your own perfect paper clips.
Wishing you creative days!