
Hello all Vicki-Ann here today. Well what an honor to be doing my first post for Helmar and they have asked me to do one themed for Anzac Day. This year it is such a special Anzac Day for all of Australia and New Zealand. It is the 100th Centenary of the First World War landings, of our Anzac troops on the beaches of Gallipoli. In case you have not heard of the term Anzac before. Anzac stands for Australian and New Zealand Army Corps. The soldiers in those forces quickly became known as Anzacs, and the pride they took in that name endures to this day.
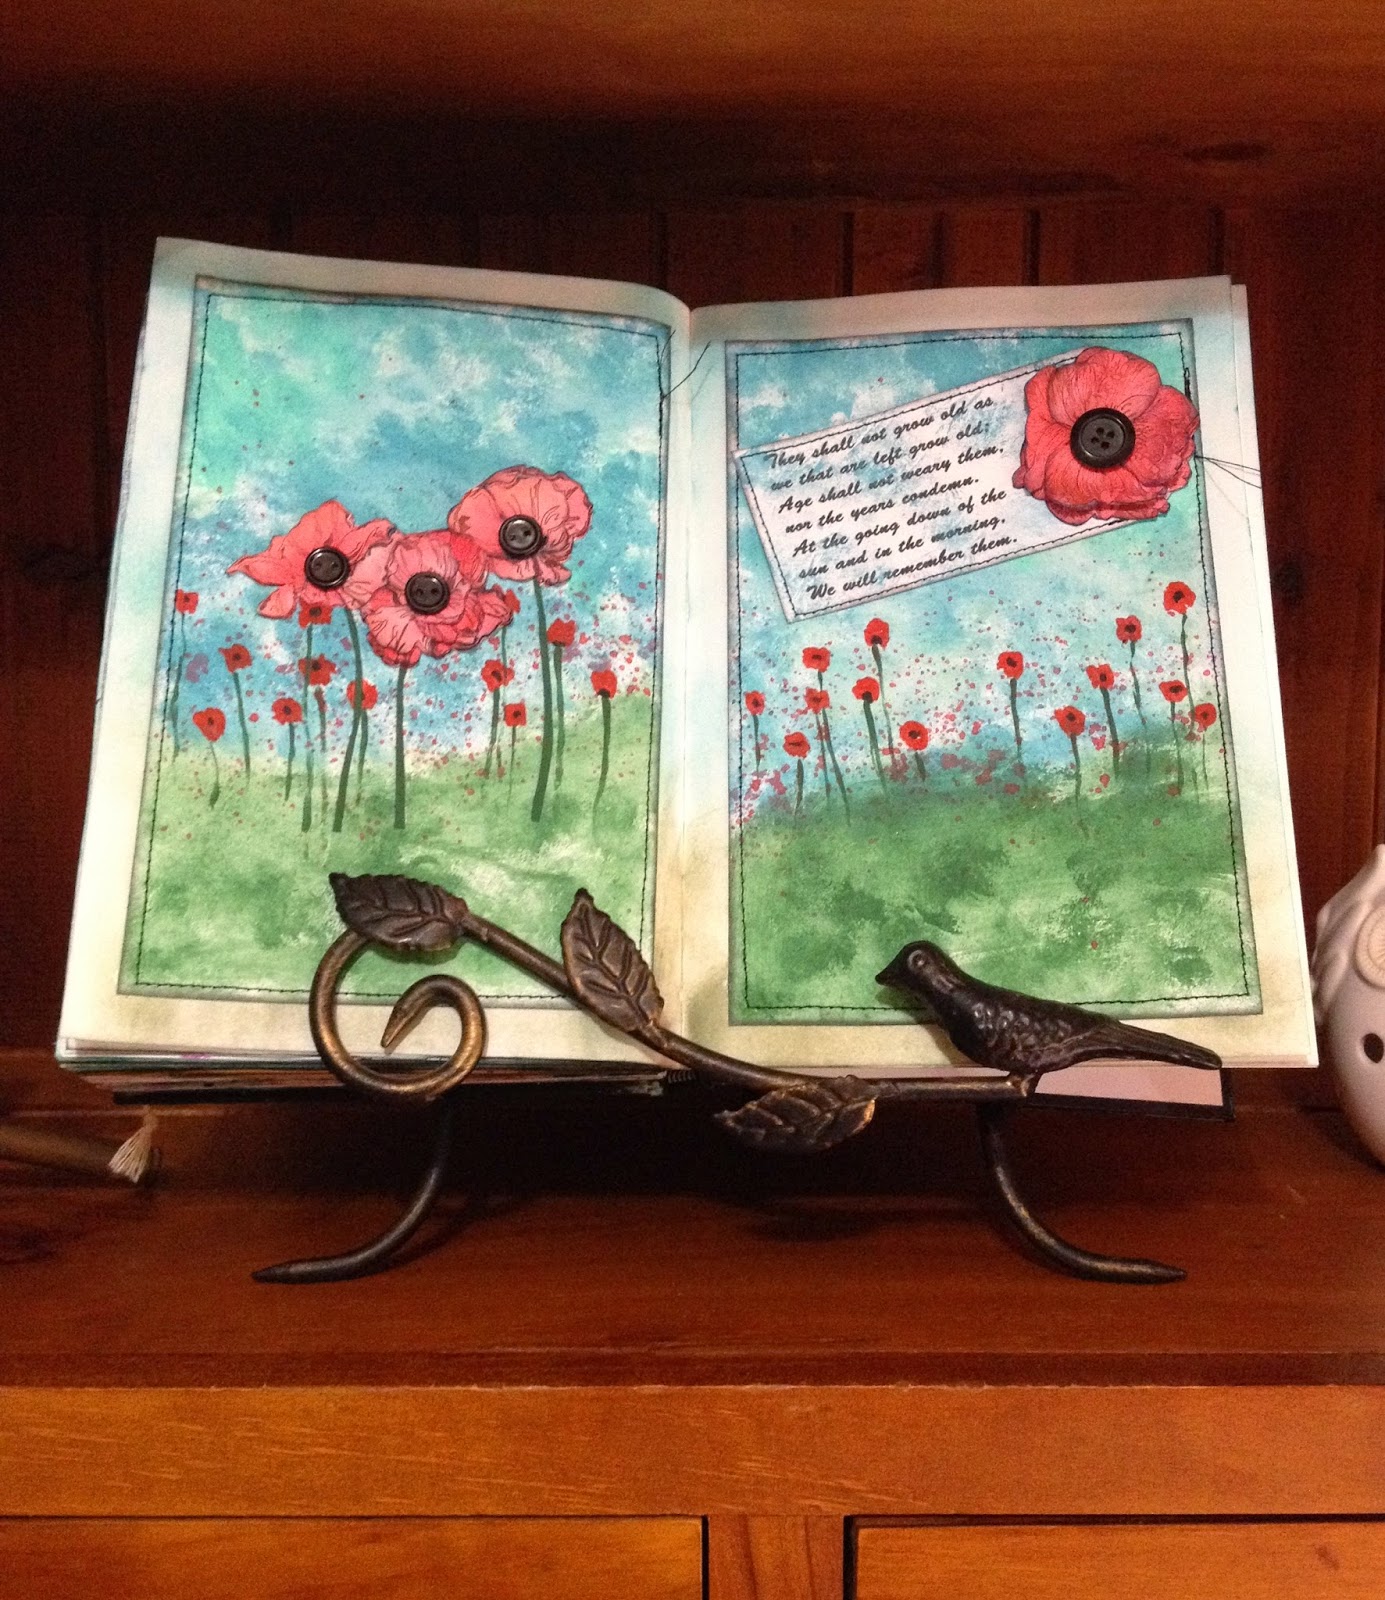
So to commemorate this special day I thought I would like to do an Art Journal spread. When I think of Anzac Day, I always think of the poppies. So that is what I thought just had to go on my Art Journal pages.

My first step was to grab my pretty Kaisercraft poppy stamp and stamp them out using Stazon ink. Then I watercoloured all the flowers with 2 different shades of red. I didn't worry about going outside the lines as they are all getting fussy cut out.

I cut one out to be the main flower. Then I cut petals out of the remaining two sets of flowers. I wanted to layer the cut petal portions of the other 2 stamped and watercoloured flowers out to give my flower dimension. I then inked all the edges of them in black ink. I glued these smaller sections of flower petals on top of each other with the Helmar 450 quick dry Adhesive. I found this was great to hold all my pieces just where I wanted them to be quickly without me having to hold them in place. Then I used more of the 450 Quick dry Adhesive to hold the small black buttons to make my centres and cover the layers of the poppies centre petals. I did the same with the single poppy just added a larger button to the centre.
 Next I did my background. I used 2 pieces of cardstock cut to the size of my Art Journal pages. So on both pages I painted the sky in 2 different blues and then the grass with a babywipe using some DecoArt Acrylic paints. I wanted to get a very muted background. I painted some red splodges of colour with a very tiny brush and popped some little black dots and green stems. Splashed the background with a fan brush in red to look like there was even more poppies going off into the distance.

Now it was time to add the Helmar Liquid scrap dots under the petals of my single poppy and to the set of the three poppies. I wanted them to stay up with the dimension and not squash flat in my Art Journal. Awesome how it makes the flower petals just pop up and stay there just where I want them to be.

At the dawn service, when everyone is saying this part of the poem from 'For the Fallen' By Robert Laurence Binyon.
They Shall not grow old as we that are left grow old;
Age shall not weary them, nor the years condemn.
At the going down of the sun and in the morning,
We will remember them.
It is always such a memorable moving moment. So felt I had to add that to my pages. So I printed the quote out onto some cardstock and made this into a tag. Added the other single poppy, that is bigger to the top of this tag with Helmar Tacky Craft Glue. I then added more of the Tacky Craft Glue on the back of my 3 poppy flowers and the back of the tag spreading it around with Helmar Paint/Glue spreader and positioned them where I wanted them on my painted cardstock backgrounds.

To add these separate pages to my Art journal. I put Tacky Craft Glue on the back of the pages and pressed them flat into my Art Journal. This technique of adding the separate pages in my Art Journal is working so well for me. I like being able to add the machine stitching around my pages it adds a finishing touch that I like to do.

This is how I have had my Art Journal displayed coming up to Anzac day. I pop my Art Journal on this cute metal bird stand in my dining room. I like being able to display it like this. I can turn the pages and have different pages on display for all the occasions throughout the year.
Thanks for stopping by the Helmar blog today and hope that you will give the 450 quick dry Adhesive, Liquid scrap dots and Tacky Craft Glue a try next time you need some dimension and that super fast hold on your collage Art Journal pages.
Come and visit me over on my blog at lonelycards.blogspot.com.au.


