Greetings, craft fans! Do you love the look of flowers but hate how quickly cut blossoms fade? Are you like me and can't keep a houseplant alive to save your life? Jenn, here, to show another way to decorate your home, your office, or your next event with wilt-free petals and stems.
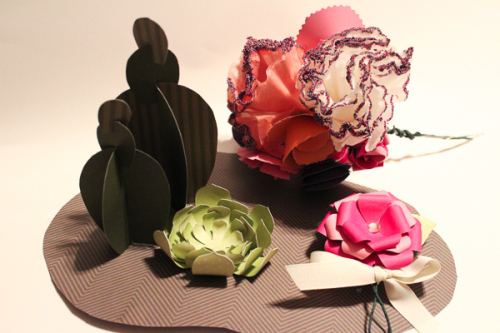
When my husband and I got married in 2013, we decorated completely with faux flowers. Not only did this save us oodles of money, it allowed me to make the decorations, bouquet, boutonnieres, etc. way in advance over the course of our long engagement. Our flowers were made of tissue paper, crepe paper, wood, beads, knitted, and even a few adding machine tape ribbon roses (as we're both in accounting).

Today I want to show you a few simple ways to get started with paper flowers (sometimes referred to as florigami).
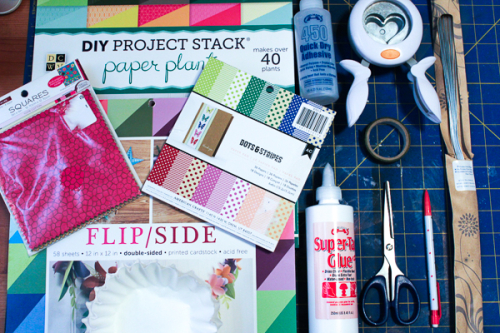
To get started, grab some double-sided paper, scissors, a pencil, a heart-shaped punch (or dies), wire, and floral tape. Don't forget your glues: Helmar 450 Quick Dry Adhesive and Helmar Super-Tac Glue are great options for paper petals.
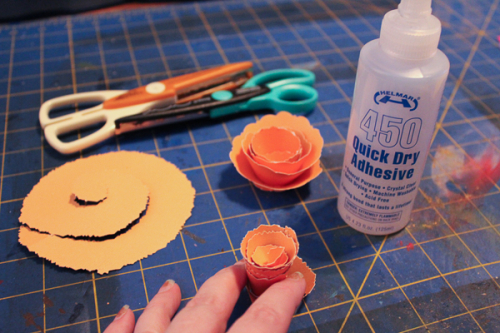
Trace a circle onto a sheet of double-sided cardstock and cut out with a pair of scissors. Cut the circle into a spiral (decorative-edge circles will add variety to the petals) and roll the long strip into itself from the outside in. Once you reach the center, add some Helmar 450 Quick Dry Adhesive to the base and let the coil open up, securing the botton edge in the glue.
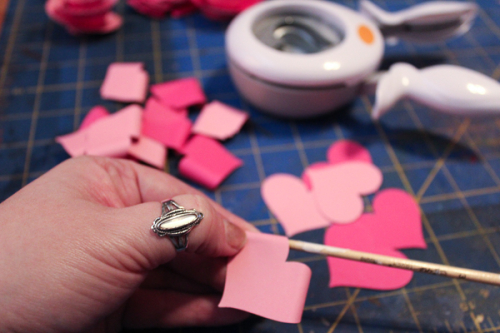
For another style of flower, cut or punch several hearts from double-sided cardstock and curl the rounded tops over a skewer, pencil, or paint brush handle (depending on the size of your hearts. (This technique also makes very believable flowers when used with tissue or crepe paper.)
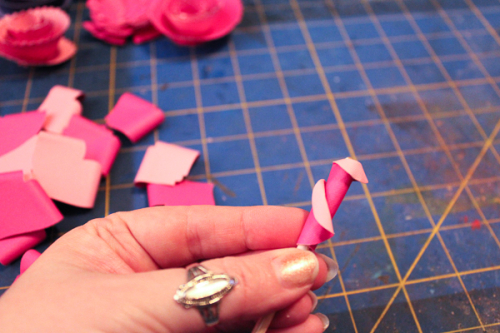
To start a "realistic" 3-d rose, take one curled heart and wrap it into a coil, securing the overlapping petals with Helmar Super-Tac Glue.
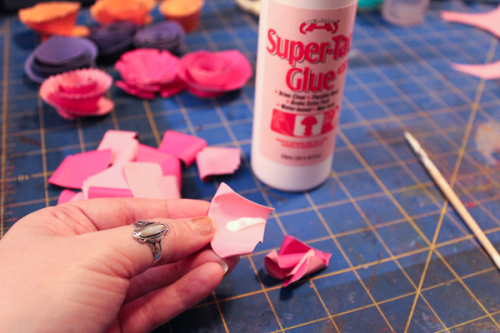
Continue to wrap the curled hearts around the center coil, bending the petals outward as you go for a fuller flower, and securing each with more Helmar Super-Tac Glue.
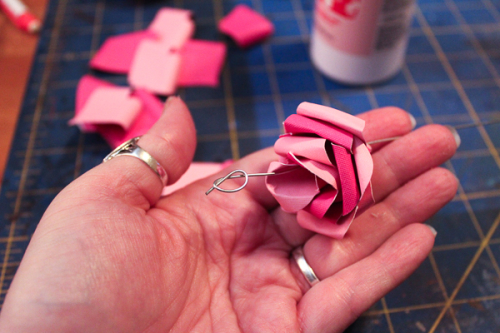
Fold a loose loop in one end of the floral wire and slip it through the center of the flower to start the stem.
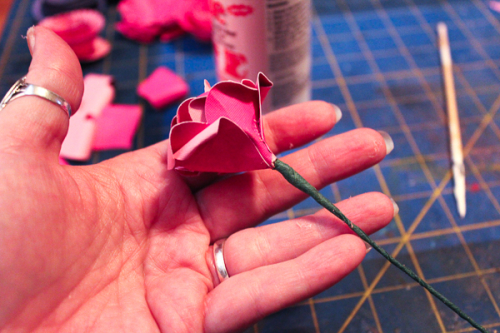
Wrap the base of the flower and the wired stem with floral tape to secure the wire to the flower and create a semi-realistic stem.
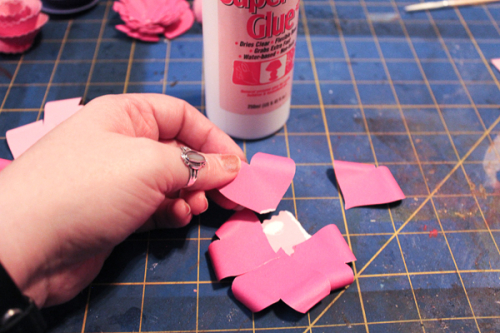
For flat-backed roses, attach a circle of the curled hearts to a scrap piece of cardstock with Helmar Super-Tac Glue. It's up to you whether the curls face up or down.
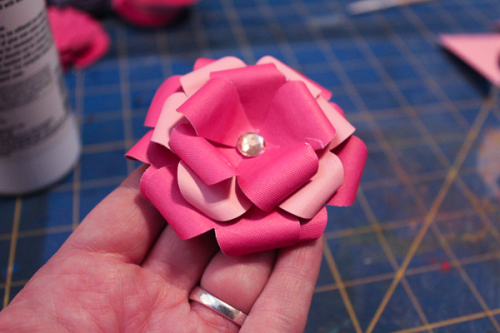
Three layers of petals, each placed a little more towards the center than the last, make a nice, full, flower. For the center section you may want to snip the hearts in half creating separate petals. Buttons, beads, or flat-backed gems make great flower centers.
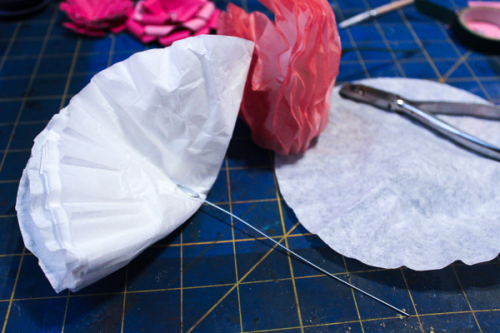
One way to make quick, full flowers is to flatten and fold in half, a stack of coffee filters and wrap them around a wire stem. Secure the coffee filters to the wire with floral tape and fluff out the petals. You can color them easily with watercolors or sprays.
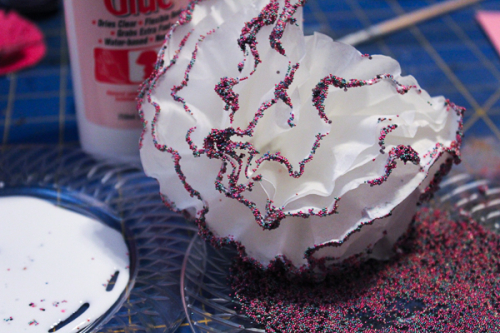
Pour some Helmar Super-Tac Glue onto a disposable plate and micro beads onto a second. Dip the edges of the coffee filter flower into the glue and then into the beads to add detail to the ruffled petals.
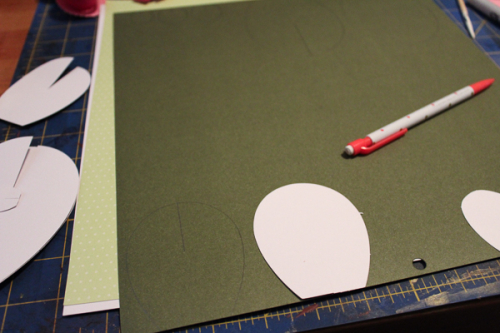
More into the succulent trend? Use a pattern to cut interlocking pieces of double-sided cardstock (these came in a paper stack kit from DCWV).
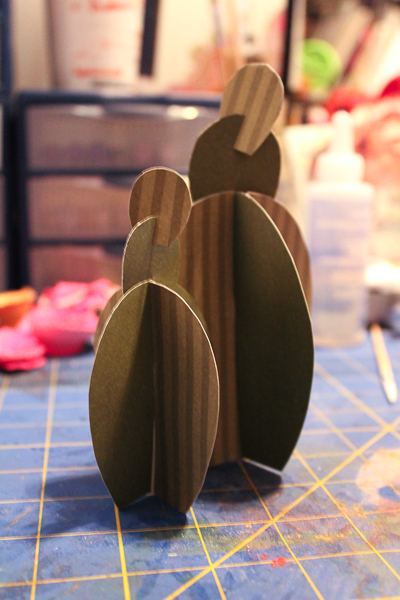
Slot the pieces together to create a quick and easy 3-d cactus or two. For a permanent placement, secure the base of the cactus to a piece of cardstock with Helmar 450 Quick Dry Adhesive.
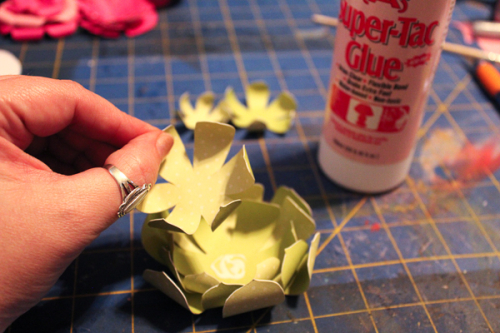
For the smaller succulent, the petals were curled inward before being stacked and glued into place with some Helmar Super-Tac Glue.
But that's just the beginning! Consider using wilder patterned papers for some one-of-a-kind arrangement. Coat fabric with Helmar Fabric Stiffener & Draping Liquid to cut and form as you would the paper petals. Ribbon roses (there are many tutorials all over the web) can also be made out of strips of paper, not just fabric ribbon.
And with this project (my 35th for Helmar over the past 2 years), I bid you a fond farewell. I have enjoyed my tenure with the Helmar Team immensely, but I think it's time for me to step down and make room for someone new. I can't wait to see what the team comes up with in the future, and I continue to wish you all creative days.